
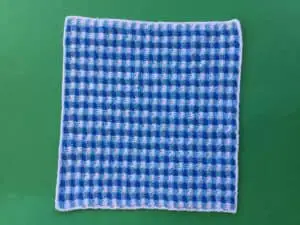
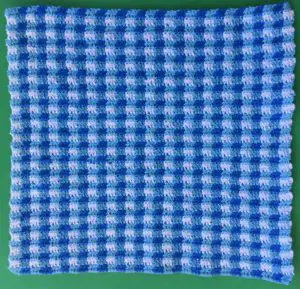
Welcome to my plaid picnic blanket crochet applique pattern. This is part of my teddy bears picnic blanket and the plaid applique blanket will go onto the blanket that I made, along with teddies, a tree and a swing. This is what the finished applique blanket will look like.

There’s also a video tutorial for this pattern available on my YouTube channel at plaid picnic blanket crochet applique tutorial.

Other patterns that are in the teddy bears picnic blanket series include the blanket, picnic basket, the kite, picnic table, food for the picnic table, food for the picnic blanket, pram, airplane, barbecue, barbecue apron and utensils, tree, blossoms and a swing, teddy bear applique, child teddy bear and baby teddy bear, teddy bear with accessories, teddy bear and combining the teddy bears picnic baby blanket.
To view this pattern for free continue scrolling down this page. If you would like to download the ad-free version, it’s available on my Ravelry store for $1 at plaid picnic blanket crochet applique pattern.
This pattern will be using UK terminology. If you would like to view the US version go to plaid picnic blanket crochet applique pattern (US Version).
Plaid Picnic Blanket Crochet Applique Pattern
Abbreviations
- st – stitch
- sts – stitches
- ch – chain
- sl st – slip stitch
- dc – double crochet
- tr – treble crochet
Materials Used
- 3 colours of cotton or wool, I used 4 ply crochet cotton.
- A crochet hook, I used a 1.25mm hook.
- Scissors.
- Darning needle to weave in ends.
This blanket could be made in any weight yarn and any size. For the pattern your initial chain must be able to be divided by 6.
Size
10” x 9.5” or 25cm x 24cm
Picnic Blanket
90 ch.
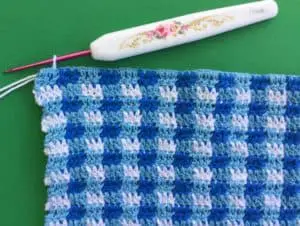
I cut off the contrast cotton at the end of each row rather than crochet over it for a whole row. As I was alternating between 2 colours for each row, I’d crochet over the top of the cotton I wasn’t using.
Row 1: Miss 3 ch and (work 1 tr in each of next 3 sts, change to 1st contrast and work 1 tr in each of following 3 sts, change back to main colour) repeat to last 3 sts, work 1 tr in each of last 3 sts. Turn.


Row 2: Join 2nd contrast colour and work 3 ch (work 1 tr in each of next 3 sts, change to main colour and work 1 tr in each of following 3 sts, change back to 2nd contrast) repeat to last 3 sts, work 1 tr in each of last 3 sts. Turn.


Row 3: 3 ch, using main colour work 1 tr in each of next 3 sts, (join 1st contrast, work 1 tr in each of following 3 sts, change back to main colour and work 1 tr in each of next 3 sts) repeat to end of row. Turn.


Repeat rows 2 and 3 until your blanket is the desired length ending with row 3. Fasten off.

Weave in ends.
Neatening Row
Join 2nd contrast to any stitch.

1 ch, work 1 dc in each st along sides and 1 dc, 1 ch, 1 dc in each corner st. Join with a sl st in 1st st. Fasten off.


Weave in ends.