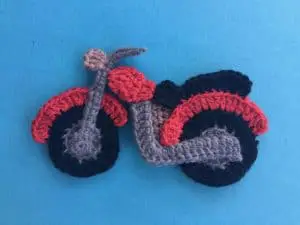
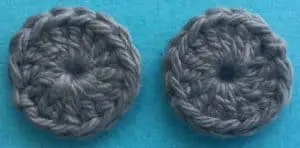
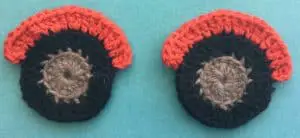
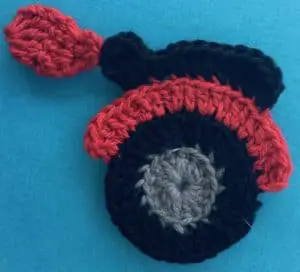
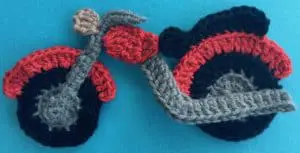
Welcome to my crochet motorbike pattern. This was a request. The finished motorbike applique will look like this.

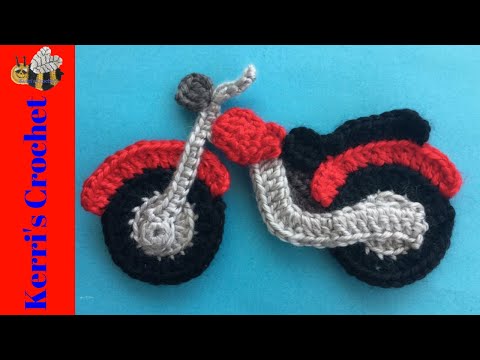
There’s also a video tutorial for this pattern available on my YouTube channel at crochet motorbike tutorial.
To view this pattern for free, continue to scroll down this page. If you would like to download the ad-free version, it’s available on my Ravelry store for $1 at crochet motorbike pattern or on my LoveCrafts store at crochet motorbike pattern.
This pattern will be using US terminology. If you would like to view the UK version go to crochet motorbike pattern (UK Version).
Crochet Motorbike Pattern
Abbreviations
- st – stitch
- sts – stitches
- ch – chain
- sl st – slip stitch
- sc – single crochet
- hdc – half double crochet
- dc – double crochet
- tr – treble crochet
Materials Used
- 4 colors of crochet cotton or wool, I used 4 ply crochet cotton.
- A crochet hook, I used a 1.5mm hook.
- Scissors.
- Darning needle to weave in ends.
- Sewing needle and thread to stitch the motorbike together.
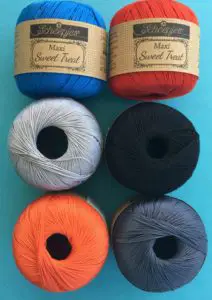
For the 2 ply crochet cotton applique I used Scheepjes Maxi Sweet Treat Black (110), Mercury (074), Charcoal (393) for each bike and Royal Orange (189), Royal Blue (215) and Poppy Rose (390) on one bike each. All the 2 ply crochet cotton was from The Yarn Bowl.

Here is the motorbike made in the 2 ply crochet cotton.

Size
Large motorbike (Using 8 ply wool)
15cm x 10cm or 5.75” x 4”
Medium motorbike (Using 4 ply crochet cotton)
10.5cm x 5cm or 4” x 2”
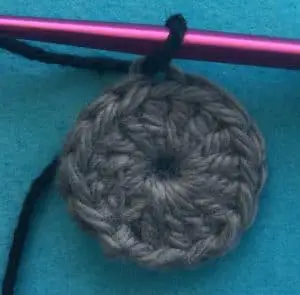
Inner Wheels (Make 2)
Make a magic loop.
2 ch, work 15 dc into circle, pull circle tight and join with a sl st in top of 1st st. Fasten off.

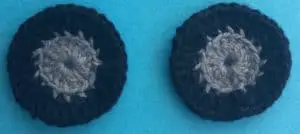
Outer Wheels
Join black cotton to back loop only of any stitch on inner wheel.

2 ch, work 2 dc in back loop only of each st around. Join with a sl st in top of 1st st. Fasten off.

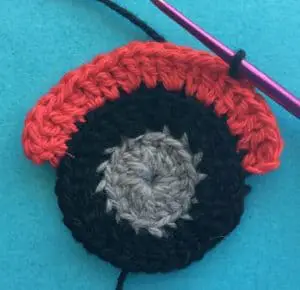
Mudguards
Join cotton to back loop only of any stitch on outer wheel.
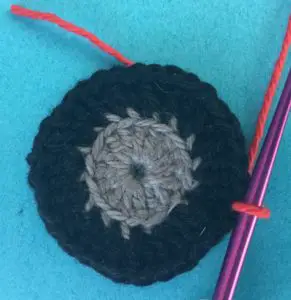

2 ch, working in the back loop only of each st work 1 dc in same st as ch, (1 dc in next st and 2 dc in following st) 5 times, 1 dc in next st, 2 ch, sl st in same st as last dc. Fasten off.

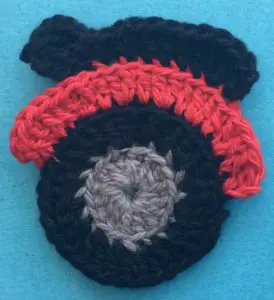
Seat
Join cotton to back loop only of 6th st from back of back mudguard.

2 ch, working in the back loop only of each st work 1 dc in same st as ch, 2 tr in next st, 1 dc in each of following 5 sts, 2 hdc in next st, 1 hdc in following st, 4 ch, work a 3 tr cluster over the end of the last hdc. Fasten off.

Join cotton in end of seat as shown.
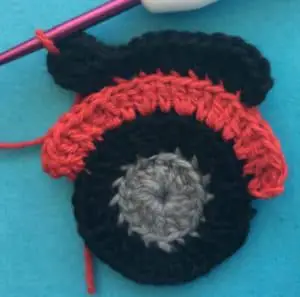

Row 1: 3 ch, work 2 dc in same place as ch. Turn.
Row 2: 3 ch, work 2 dc in each st. Turn.
Row 3: 3 ch, work a dc cluster over all sts. Fasten off.

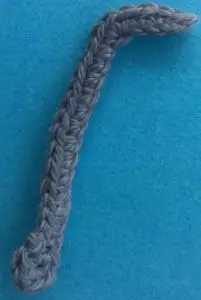
Handlebar
Make a magic loop.
1 ch, work 6 sc into circle, pull circle tight and join with a sl st in top of 1st st, 18 ch, miss 1 ch and work 1 sc in each of next 3 sts, 3 sc in next st, 1 sc in each ch to end. Sl st in top of circle and fasten off.

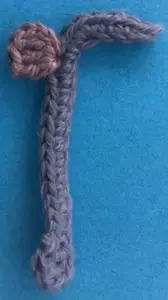
Light
Join cotton 2 sts down from the bend as shown.

4 ch, work 1 tr and 2 dc in same st as ch. Fasten off.

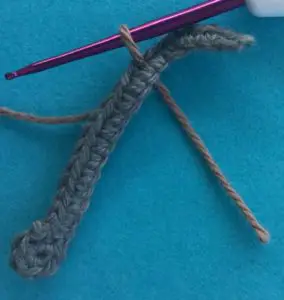
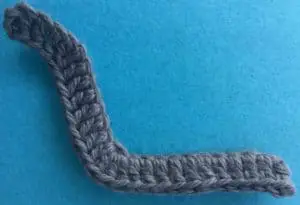
Frame Part
25 ch.
Miss 3 ch, work 1 dc in each of next 3 ch, a joined dc over following 2 sts, 1 dc in each of next 6 sts, 4 dc in following st, 1 dc in each st to last st, 1 dc and 1 tr in last st. Fasten off.

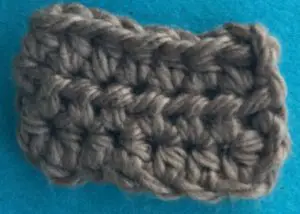
Back Plate
9 ch.
Row 1: Miss 2 ch and work 1 hdc in each st to end. Turn.
Row 2: 2 ch, work 1 hdc in each st to end. Turn.
Row 3: 2 ch, work 1 hdc in each st to end. Fasten off.

To Make Up
Weave in ends. Stitch handlebar piece to front wheel as shown.
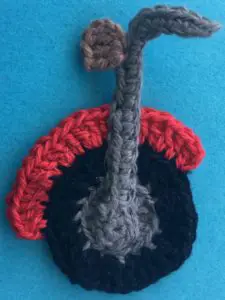

Sew top of frame part to handlebar piece where shown.

Attach the part in front of the seat to the frame part near the handlebar as shown.

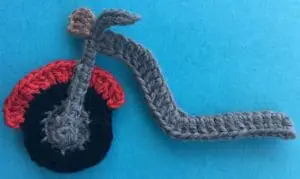
Stitch the bottom part of the frame part across the back wheel.

Attach the back plate behind the frame part, wheel and seat.
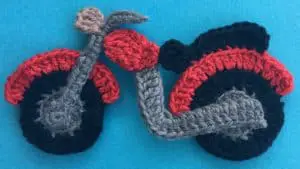
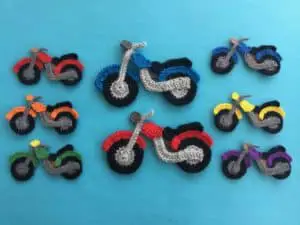
And there’s the finished crochet motorbike. I’ve also made it in different sizes and colors.
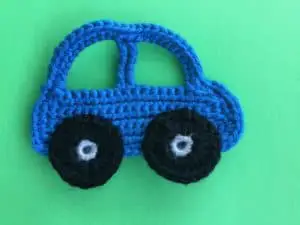
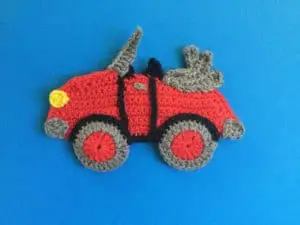
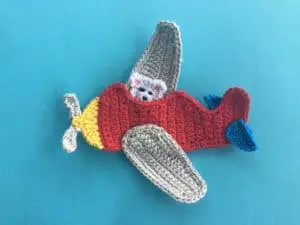
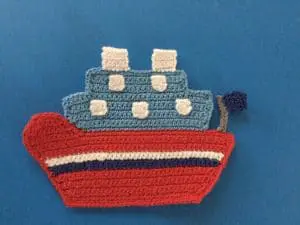
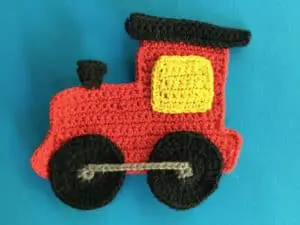
I hope that you’ve enjoyed the pattern. If you have I’ve also got a bicycle pattern, easy car pattern, convertible car pattern, airplane pattern, a ship pattern and a train engine pattern that you might like.