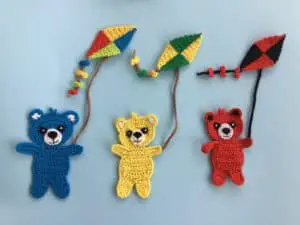
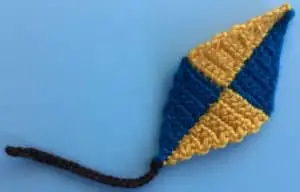
Welcome to my crochet kite pattern. This is another pattern in my teddy bears picnic blanket series. The finished crochet kite applique will look like this.


There’s also a video tutorial for this pattern available on my YouTube channel at crochet kite tutorial.

Other patterns that are in the teddy bears picnic blanket series include the blanket, the plaid picnic blanket, picnic basket, picnic table, food for the picnic table, food for the picnic blanket, pram, airplane, barbecue, barbecue apron and utensils, tree, blossoms and a swing, teddy bear applique, child teddy bear and baby teddy bear, teddy bear with accessories, teddy bear and combining the teddy bears picnic baby blanket.
To view this pattern for free, continue to scroll down this page. If you would like to download the ad-free version, it’s available on my Ravelry store for $1 at crochet kite pattern.
This pattern will be using UK terminology. If you would like to view the US version go to crochet kite pattern (US Version).
Crochet Kite Pattern
Abbreviations
- st – stitch
- sts – stitches
- ch – chain
- sl st – slip stitch
- dc – double crochet
- htr – half treble crochet
Materials Used
- 3 colours of cotton or wool, I used 8 ply wool which is light worsted in the US and double knit in the UK.
- A crochet hook, I used a 3mm hook.
- Scissors.
- Darning needle to weave in ends and stitch the bows and string to the kite.
Size
Large kite with tail but not string (Using 8 ply wool)
18cm x 6.5cm or 7” x 2.5”
Medium kite with tail but not string (Using 4 ply crochet cotton)
12cm x 4cm or 4.75” x 1.5”
Kite
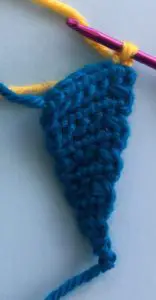
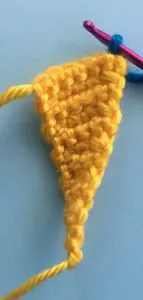
Using 1st kite colour work 7 ch.
Row 1: Miss 1st ch and work 1 dc in each st to end. Turn.
Row 2: 1 ch, work 1 dc in each st to last 2 sts, a joined dc over last 2 sts. Turn.
Row 3: 1 ch, work 1 dc in each st to end. Turn.
Row 4: 1 ch, work 1 dc in each st to last 2 sts, a joined dc over last 2 sts. Turn.
Row 5: 1 ch, work 1 dc in each st to end. Turn.
Row 6: 1 ch, work 1 dc in each st to last 2 sts, a joined dc over last 2 sts. Turn.
Row 7: 1 ch, work 1 dc in each st to end. Turn.
Row 8: 1 ch, work 1 dc in 1st st, a joined dc over last 2 sts. Turn.
Row 9: 1 ch, work 1 dc in each of 2 sts. Turn.
Row 10: 1 ch, work a joined dc over the 2 sts. Turn.
Row 11: 1 ch, work 1 dc in st. Turn.
Row 12: Sl st in st, work 1 ch. Fasten off leaving a long tail to stitch the kite together.


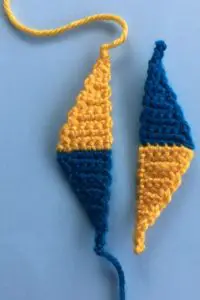
2nd Colour
Join in bottom 1st st on sloped side of 1st piece as shown.

Row 1: 1 ch, work 1 dc in same st as ch, 1 dc in each st to end. Turn.
Row 2: 1 ch, work 1 dc in each st to last 2 sts, a joined dc over last 2 sts. Turn.
Row 3: 1 ch, work 1 dc in each st to end. Turn.
Row 4: 1 ch, work 1 dc in each st to last 2 sts, a joined dc over last 2 sts. Turn.
Row 5: 1 ch, work 1 dc in each st to end. Turn.
Row 6: 1 ch, work 1 dc in each st to last 2 sts, a joined dc over last 2 sts. Turn.
Row 7: 1 ch, work 1 dc in each st to end. Turn.
Row 8: 1 ch, work 1 dc in 1st st, a joined dc over last 2 sts. Turn.
Row 9: 1 ch, work 1 dc in each of 2 sts. Turn.
Row 10: 1 ch, work a joined dc over the 2 sts. Turn.
Row 11: 1 ch, work 1 dc in st. Turn.
Row 12: Sl st in st, work 1 ch. Fasten off leaving a long tail to stitch the kite together.
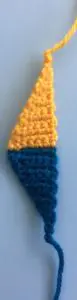

Make the 2nd side of the kite the same as the 1st but using the 2nd kite colour 1st and then join in the 1st kite colour. You don’t need to leave a long tail after fastening off the 2nd side.
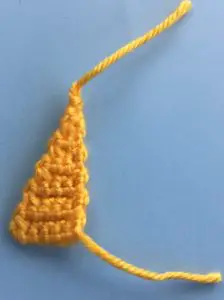


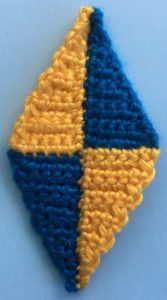
To Make Up Kite
Place the 2 pieces of kite together with the 1st kite colour on top of the 2nd kite colour and using the long tails stitch the kite pieces together down the straight side of the kite. Weave in ends.


Tail
Join string colour cotton to one end of the kite as shown.
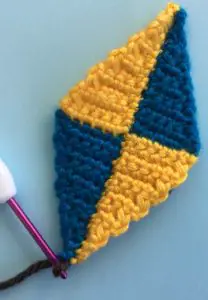

Ch 25. Fasten off.

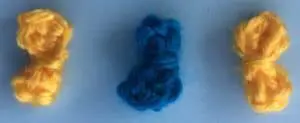
Bow (Make 3 or 4)
5 ch.
Work a htr in 3rd ch from hook, sl st in next st, 1 htr in last st, 2 ch, sl st in same ch as last htr. Fasten off leaving a long tail to stitch to the kite tail.

String to Fly Kite
Using string colour work the desired length of ch. Fasten off leaving a tail to stitch it to the kite.
To Make Up
Weave in ends. Attach the bows evenly along the tail.


Stitch the string to the back of the kite.
And here’s the kite with some teddies.