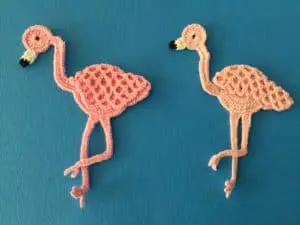
Welcome to the newest crochet pattern which will be a crochet flamingo pattern. The finished flamingo will look like this.

For the video tutorial go to my YouTube channel at Crochet Flamingo Tutorial.

To view the complete pattern continue to scroll down the page. Or if you would like to download the pattern in PDF format it’s on Ravelry for $1 at Crochet Flamingo Pattern.
This pattern will use UK terminology, for the US version go to the page Crochet Flamingo Pattern (US Version).
Flamingo Crochet Pattern
Abbreviations
- st – stitch
- sts – stitches
- ch – chain
- sl st – slip stitch
- dc – double crochet
- htr – half treble crochet
- tr – treble crochet
- dtr – double treble crochet
- ttr – triple treble crochet
Materials Used
- Pink, black and white cotton or wool.
- Crochet hook.
- Scissors.
- Darning needle to weave in the ends.
- Black sewing thread.
- Sewing needle to embroider on the eye.
Purchasing Supplies
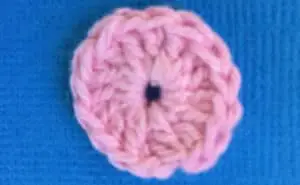
Head
Make a magic loop.
Work 3 ch and 15 tr into loop and join with a sl st into 3rd ch. Pull tight and fasten off.

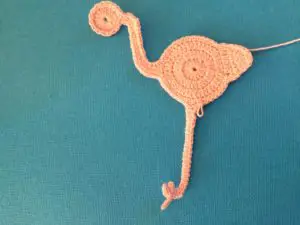
Body
Make a magic loop.
Row 1: 3 ch. Work 14 tr into loop and pull tight. Sl st into 3rd ch.
Row 2: 3 ch. Work 1 tr in same place as the ch and 2 tr into each tr around. Join with a sl st in 3rd ch.
Row 3: 3 ch, 1 tr in same place as ch *Work 1 tr in each of next 2 tr and 2 tr in following tr * repeat from * to * to end, sl st in 3rd ch. Don’t end off.


Tail
Row 1: 3 ch. Work 1 tr into next 4 tr, 1 dec tr into next 2 tr. Turn.
Row 2: 3 ch. Work 2 dec tr over next 4 tr, 1 tr in last tr. Turn.
Row 3: 3 ch. Work a cluster tr over all 3 tr. Fasten off.


Neck
Join cotton to body across from the tail, ch 20 and join to head with a sl st.


Work 1 dc in first ch, 1 dec dc over next 2 ch, 1dc in next st,1 dec dc over next 2 ch, 1 dc in each of next 9 ch, work 2 dc in next ch, 1 dc in following ch, 2 dc in next ch and 1 dc in each of remaining ch, continue working dc around the body until last stitch before neck work a 3 tr cluster into the last st of the body, join of the body and the neck and the 1st st of the neck, 1 htr in the back of the 2nd ch of the neck, 1 dec htr over next 2 sts. 1 dc in next st, 1 dec dc over next 2 sts, 1 dc into each of next 9 sts, 2 dc into next st 1 dc in following st and 2 dc into next st. Work 1 dc into remaining sts on neck and around the head and sl st into the 1st st on the neck. Fasten off.


Front Leg
Join yarn to body about 7 sts down from neck.
24 ch.
Miss 1 ch, 1 sl st into each of next 2 ch, 1 htr into next ch, 4 ch, miss 1st ch and sl st into each of next 3 ch, sl st into htr, 4 ch, miss 1st ch and sl st into each of next 3 ch, sl st into htr, 3 dc in next st, dc into each ch until last 4 ch, into these sts work 2 htr and 2 tr. Sl st into body. Sl st into next st and start back leg.


Back Leg
24 ch.
Miss 1 ch, 1 sl st into each of next 3 ch, 4 ch, miss 1st ch and sl st into each of next 3 ch, sl st into end of 1st toe, dec dc over next 2 sts, 1 dc into each of next 7 ch, 5 dc in next st, dc until last 4 ch, into these sts work 2 htr and 2 tr. Sl st into body and fasten off.

Wing
Join yarn to end centre of tail.

Row 1: 1 ch, 1 dc in same place, (5 ch, miss 2 sts, 1 dc in next st) repeat across to joining with neck. Turn.
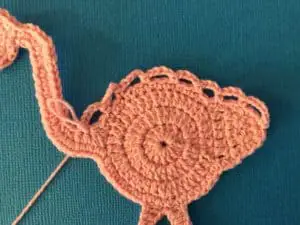
Rows 2 – 5: 1 ch, 1 dc in first loop, (5 ch, 1 dc in next loop) repeat across all loops. (You have 1 less 5 ch loop with each row). Turn.
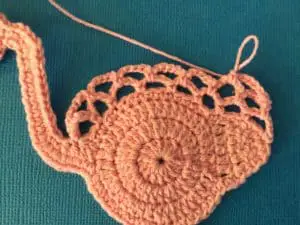
Row 6: 1 ch, 1 dc in first loop, (5 ch, 1 dc in next loop) repeat across all loops. Fasten off.


Beak
Join cotton to head 5 sts. up from neck joining.
Row 1: Work 2 ch, work 1 htr into same st, and 2 htr into next st. Turn.
Row 2: 2 ch Work a dec. htr into next 2 sts, then a dec htr into same st and next st.

Change to black yarn
2 ch. Work a htr cluster over all sts. Fasten off.
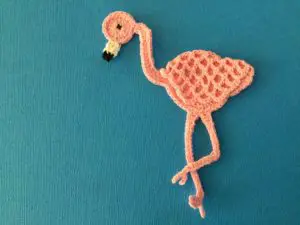
To make up
Weave in ends. Embroider an eye over the centre circle in the head. Iron wing down over body and iron legs and neck into place.
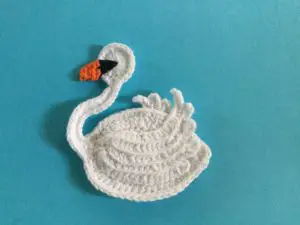
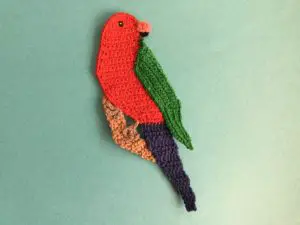
If you liked the flamingo pattern you may also be interested in this swan or this king parrot.