
Welcome to my latest crochet pattern. This week I’ve got this crochet crouching tiger pattern for you that will look like this.


If you would like to follow along with a video tutorial for this pattern I’ve uploaded the how-to video onto my YouTube channel at Crochet Crouching Tiger Tutorial.

You can view the pattern in full by continuing to scroll down on this page. The pattern is also available to download on Ravelry for $1 at Crochet Crouching Tiger Pattern.
This pattern will be using US terminology, if you would like to get the UK version go to Crochet Crouching Tiger Pattern (UK Version).
Crochet Crouching Tiger Pattern
Abbreviations
- st – stitch
- sts – stitches
- ch – chain
- sl st – slip stitch
- sc – single crochet
- hdc – half double crochet
- dc – double crochet
- tr – treble crochet
- dtr – double treble crochet
Materials Used
- Orange, white and black cotton or wool.
- Crochet hook.
- Scissors.
- Thread to sew together.
- Sewing needle.
- Darning needle to weave in ends.
- Pink or red embroidery cotton if desired to embroider on a mouth.
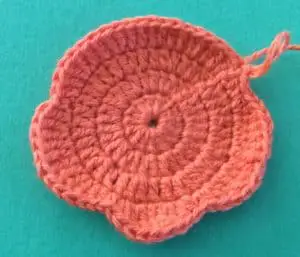
Head
Make a magic loop.
Row 1: 3 ch. Work 14 dc into loop and pull circle tight. Slip st into 3rd ch.
Row 2: 3 ch. 1 dc in same place as ch. Work 2 dc into each st. Join with a sl st in 3rd ch.
Row 3: 3 ch. Work 1 dc in same place as ch (1 dc in each of next 2 sts and 2 dc in following st) repeat to end, sl st in 3rd ch.
Row 4: 3 ch, Work 1 dc in same place as ch (1 dc in each of next 2 sts and 2 dc in following st) 4 times, 1 dc in each of next 2 sts, 1 sc in following st, 1 hdc and 1 dc in next st (1 tr in next st and 2 tr in following st) 3 times, 1 dc and 1 hdc in next st, 1 sc in next st, 1 hdc and 1 dc in next st, 2 tr in next, 1 tr in following st and 2 tr in next st, 1 dc and 1 hdc in next st, 1 sc in next st and 1 hdc and 1 dc in following st (1 tr in next st and 2 tr in following st) 3 times, 1 dc and 1 hdc in next st, 1 sc in last st, sl st in 3rd ch. Don’t fasten off.

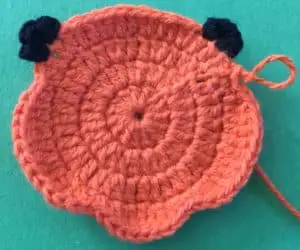
Inner Ear
Join black cotton 1 st on from fastening off on head.
1 ch, 1 hdc and 1 dc in same st as ch, 1 dc, 1 hdc and 1 sc in next st. Fasten off.


2nd Inner Ear
Join black cotton 3 sts back from dc on other side of head.


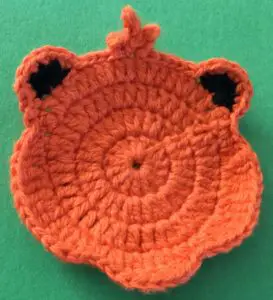
Outer Ears
Using the orange cotton from the head work sc in each st around the 1st ear, sl st in each st to the centre st between the 2 ears, in this st work 3 ch, work 1 sl st in 2nd ch from hook and 1 sc in next st, sl st into same place on head, 4 ch, 1 st sl in 2nd ch from hook, 1 sc in each of next 2 ch, sl st into same place on head, 3 ch, sl st in 2nd ch from hook, 1 sc in next st and sl st into same place on head. Sl st along head until st before 2nd ear. Work sc in each st around ear. Sl st into head and fasten off.

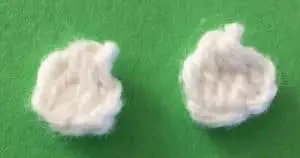
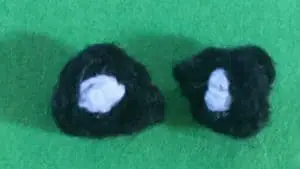
Outer Eyes (Make 2)
Using white make a magic loop.
Into circle work 3 ch and a 4 dc cluster. Pull circle tight but don’t join. Fasten off.

Inner Eyes (Make 2)
Using black make a magic loop.
Into circle work 1 ch and 2 sc. Pull circle tight and join with a sl st in ch. Fasten off.
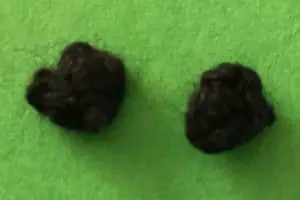

Nose
Using black make a magic loop.
Into circle work 3 ch and a 3 dc cluster. Pull circle tight but don’t join. Fasten off.


Body
Using white make a magic loop.
Row 1: 2 ch. Work 2 hdc, 4 dc, 6 hdc, 3 tr, 3 hdc. into circle and pull circle tight. Slip st. into 3rd ch.
Row 2: 2 ch. 1 hdc in next st, 2 hdc in following st, 2 dc in each of next 4 sts, 2 hdc in next st, 1 hdc in each of next 4 sts, 2 hdc in next st, 2 tr in each of next 3 sts, 2 hdc in next st, 1 hdc in each st to end. Sl st in top of 2 ch.
Row 3: 2 ch. 1 hdc in each of next 2 sts, 2 hdc in next st, (2 dc in next st and 1 dc in following st) 3 times, 2 dc in next st and 2 hdc in following st, work 1 hdc in each of next 7 sts, 2 hdc in next st, (2 tr in next st and 1 tr in following st) 3 times, 1 dc and 1 hdc in next st, 1 hdc in each st to end. Join with a sl st in top of 2 ch.
Row 4: 3 ch, work 1 dc in same place as ch, (1 dc in each of next 2 sts and 2 dc in following st) 10 times, (1 dc in next st, 2 dc in following st) 3 times 1 dc in each of next 2 sts, 2 dc in next st, 1 dc in remaining sts. Join with a sl st in 3rd ch. Fasten off.


Arms (Make 2)
25 ch.
Miss 1st 2 ch, work 1 dc in each of next 13 ch, 1 tr in each of remaining ch, 4 ch, sl st in same place as last tr, 4 ch, 1 tr in back of 1st ch, 1 tr in each of next 8 sts, 1 dc in each st to end. Fasten off.


Front Paws (Make 2)
Using white work 8 ch.
Row 1: Work 1 dc and 1 tr in 3rd ch from hook, (into next st work 1 tr, 1 dc and 1 hdc, into following st work 1 hdc, 1 dc and 1 tr) 2 times, into next st work 1 tr, 1 dc and 1 hdc. Do not turn.
Row 2: Work 1 hdc into the back of each ch. Sl st into the top of the 2 ch at the beginning of row 1. Fasten off.


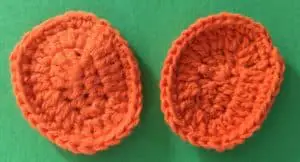
Feet (Make 2)
Row 1: 8 ch, 4 tr in 5th ch from hook, 1 hdc in each of next 2 sts, 3 hdc in last ch, 1 hdc in back of next 2 ch, sl st in 4th ch.
Row 2: 3 ch, 1 dc in same place as ch, 2 dc in each st around. Sl st in 3rd ch.
Row 3: 1 ch, 1 sc in each st around. Sl st in ch. Fasten off.

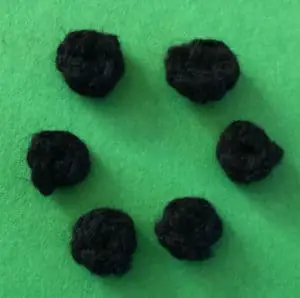
Spots for Feet (Make 6)
Make a magic loop.
1 ch work 5 sc into circle, pull circle tight and join with a sl st. Fasten off.

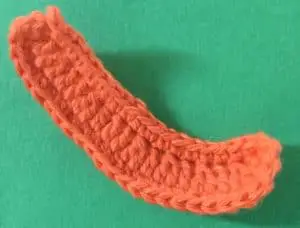
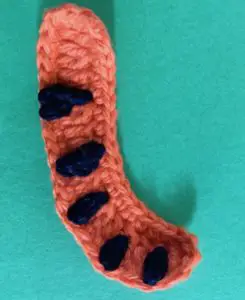
Tail
25 ch.
Row 1: 1 dc in 3rd ch from hook (1 joined dc over next 2 sts, 1 dc in following st) 4 times, (1 dc in each of next 2 sts, 1 joined dc over following 2 sts) 2 times. 1 dc in each st to end.
Row 2: 1 ch work 1 sc in each st around tail. Sl st into ch. Fasten off.

Small Black Markings (Make 10)
3 ch.
1 sl st in 2nd ch from hook, 1 sc in next st. Fasten off.


Medium Black Markings (Make 5)
4 ch.
1 sl st in 2nd ch from hook, 1 sc in next st and 1 hdc in following st. Fasten off.


Large Black Markings (Make 5)
5 ch.
1 sl st in 2nd ch from hook, 1 sc in next st, 1 hdc in each of 2 next sts. 1 dc in last st. Fasten off.


Extra-large Black Markings (Make 2)
6 ch.
1 sl st in 2nd ch from hook, 1 sc in next st, 1 hdc in each of 3 next sts. 1 dc in last st. Fasten off.


To Make Up
Weave in ends. Embroider a white dot to the middle of each inner eye.

Attach the inner eye to the outer eye towards the bottom.


Sew the nose onto the head just covering over the centre circle and embroider on the mouth.


Sew the eyes to the head where shown.

Run a length of cotton through the inner side of each arm as shown leaving the cotton attached to sew the arm to the body when the paws and markings have been attached. Attach a paw to the thick end of each arm.


Sew the spots onto the feet and the markings onto the head, arms and tail.
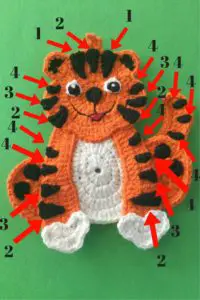

- Extra large markings (6 ch.).
- Large markings (5 ch.).
- Medium markings (4 ch.). 1 is at the end of the tail behind the foot.
- Small markings (3 ch.). 1 is behind the foot on the tail.


Gathering the arms in a bit with the attached thread sew the arms onto the body.


Attach the head to the body.


Sew a foot to each side of the body as shown.


Attach the tail.
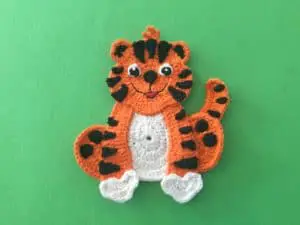
I hope that you’ve liked the crochet crouching tiger, and if you have it would be great to hear from you by leaving a message in the comments. Let me know what sort of things you’re planning on using this tiger appliqué on.