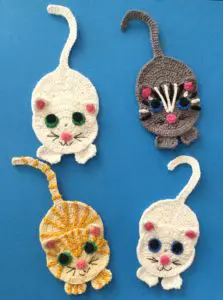
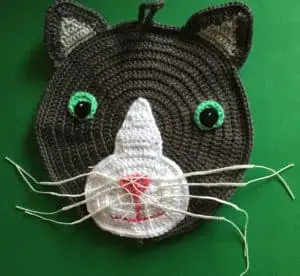
Learn how to make this crochet cat potholder pattern with my new pattern and video tutorial.


The video tutorial for this pattern will be available on my YouTube channel at Crochet Cat Potholder Tutorial.

The full crochet pattern is available to view on this page if you continue to scroll down, or you can download the pattern from Ravelry for $1 at Crochet Cat Potholder Pattern.
This pattern will be using US terminology. If you would like to view the UK version go to Crochet Cat Potholder Pattern (UK Version).
Crochet Cat Potholder Pattern
Abbreviations
- st – stitch
- sts – stitches
- ch – chain
- sl st – slip stitch
- sc – single crochet
- hdc – half double crochet
- dc – double crochet
- tr – treble crochet
- dtr – double treble crochet
Materials Used
- I used light and dark grey, green, pink, white and black wool but you could use other colours. I used 8 ply wool which is light worsted in the US and double knitting in the UK. (Don’t use synthetic wool as it would melt).
- A crochet hook, I used a 2.5mm hook.
- Scissors.
- Thread to sew together.
- Sewing needle.
- Darning needle to weave in ends.
- Fine cotton (I used 4 ply crochet cotton) for the whiskers. You could embroider on the whiskers if you prefer.
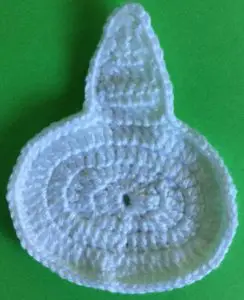
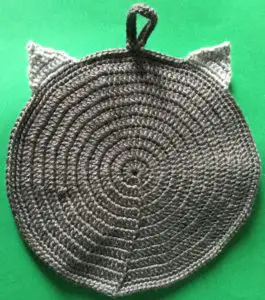
Head
Make a magic loop.
Row 1: 3 ch. Work 14 dc into circle and pull circle tight. Join with a sl st in 3rd ch.
Row 2: 3 ch. 1 dc in same place as ch. Work 2 dc into each st around. Join with a sl st in 3rd ch.
Row 3: 3 ch. Work 1 dc in same place as ch (1 dc in each of next 2 sts and 2 dc in following st) repeat to end, sl st in 3rd ch.
Row 4: 3 ch. Work 1 dc in same place as ch (1 dc in each of next 2 sts and 2 dc in following st) repeat to end, sl st in 3rd ch.
Row 5: 3 ch. Work 1 dc in same place as ch (1 dc in each of next 3 sts and 2 dc in following st) repeat to end, sl st in 3rd ch.
Row 6: 3 ch. Work 1 dc in same place as ch (1 dc in each of next 4 sts and 2 dc in following st) repeat to end, sl st in 3rd ch.
Row 7: 3 ch. Work 1 dc in same place as ch (1 dc in each of next 5 sts and 2 dc in following st) repeat to end, sl st in 3rd ch.
Row 8: 3 ch. Work 1 dc in same place as ch (1 dc in each of next 6 sts and 2 dc in following st) repeat to end, sl st in 3rd ch.
Row 9: 3 ch. Work 1 dc in same place as ch (1 dc in each of next 7 sts and 2 dc in following st) repeat to end, sl st in 3rd ch.
Row 10: 3 ch. Work 1 dc in same place as ch (1 dc in each of next 8 sts and 2 dc in following st) repeat to end, sl st in 3rd ch.
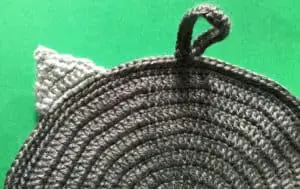
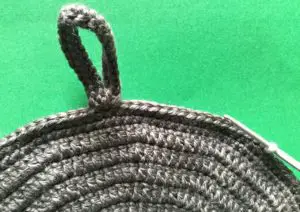
Row 11: 1 ch. Work 1 sc in each st to halfway, 25 ch, 1 sc in same place as last sc, 1 sc in each st to end. Join with a sl st in 1st ch.
Row 12: 1 ch. Work 1 sc in each st to end, including the 25 ch. Join with a sl st in 1st ch. Fasten off.


Face Marking
Make a magic loop.
Row 1: 2 ch, 2 hdc, 3 tr, 6 hdc, 3 tr, 3 hdc into circle. Pull circle tight and join with a sl st in 2nd ch.
Row 2: 2 ch, 1 hdc in next st, 2 hdc in following st, work 2 tr in each of next 3 sts, work 2 hdc in following st, work 1 hdc in each of next 4 sts, 2 hdc in following st, work 2 tr in each of next 3 sts, work 2 hdc in following st, 1 hdc in each remaining st. Sl st in 2nd ch.
Row 3: 3 ch, 1 dc in each of next 4 sts, 2 dc in each of following 6 sts, 1 dc in each of next 8 sts, 2 dc in each of following 6 sts, 1 dc in each st to end. Join with a sl st in the 3rd ch.
Row 4: 3 ch, 1 dc in same place as ch, 1 dc in each of next 2 sts, 2 dc in following st, (1 dc in next st, 2 dc in following st) 6 times, (1 dc in each of next 2 sts, 2 dc in following st) 3 times, (1 dc in next st, 2 dc in following st) 6 times, 1 dc in each of next 2 sts, 2 dc in following st. if you have any sts remaining work 1 dc into each. Sl st into 3rd ch. Fasten off.


Join wool 3 sts before centre as shown.


Row 1: 3 ch, 1 dc in each of next 6 sts. Turn.
Rows 2-3: 3 ch, 1 joined dc over 1st 2 sts, 1 dc in each st to last st, 1 joined dc over last st and top of ch. Turn.
Row 4: 3 ch, 1 joined dc over 1st 2 sts, 1 joined dc over last st and top of ch. Turn.
Row 5: 3 ch, 1 dc cluster over all sts. Don’t fasten off.


Neatening Row
1 ch, work 1 sc in each st right around face marking. Sl st into 1st ch. Fasten off.

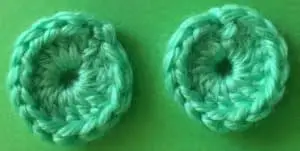
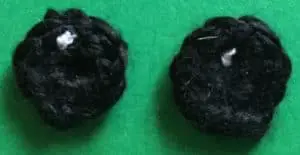
Outer Eyes (Make 2)
Make a magic loop.
3 ch, work 15 dc into circle. Pull circle tight and sl st into top of 3 ch. Fasten off.

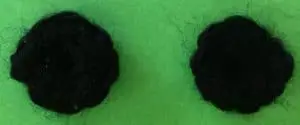
Inner Eyes (Make 2)
Make a magic loop.
1 ch, work 8 sc into circle. Pull circle tight and sl st into top of ch. Fasten off.

Nose
Make a magic loop.
Row 1: 2 ch, 1 hdc in circle. Pull circle tight but don’t join. Turn.
Row 2: 2 ch, 1 hdc in same place as ch, 1 hdc in next st, 2 hdc in top of ch. Turn.
Row 3: 2 ch, 1 hdc in same place as ch, 1 hdc in each st to top of ch, work 2 hdc in top of ch. Fasten off.


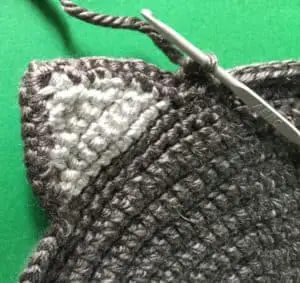
Inner Ears
For the cats right ear join yarn 11 sts after the hanger as shown. For the cats left ear join yarn 18 sts before the hanger as shown. Both ears are worked the same.
Row 1: 1 ch, I sc in same st as ch, (1 sc in next st and 2 sc in following st) 3 times, 1 sc in next st. Turn.
Rows 2-5: 1 ch, a joined sc over 1st 2 sts, 1 sc in each st to last 2 sts, a joined sc over last 2 sts. Turn.
Row 6: 1 ch, a joined sc over 1st 2 sts, a joined sc over same st as last part of joined sc and last st. Turn.
Row 7: 1 ch, a joined sc over both sts. Fasten off.


Around Ears
Both ears are worked the same.
Join main colour to wrong side 1 st before inner ear.


Row 1: 1 sc in each st around ear. Sl st into head. Sl st into previous st on head. Turn.
Row 2: Work dc around the ear working 2 dc into a st when needed to keep the ear flat especially around the tip of the ear. Sl st into the head. Fasten off.


To Make Up
Weave in ends. Embroider a white dot on each inner eye.

Stitch inner eye to outer eye.


Stitch nose to muzzle.
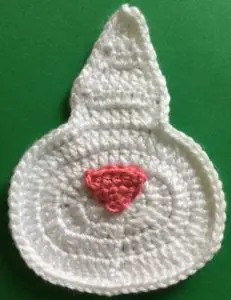

Embroider a mouth to the face marking under the nose.

Sew the face marking onto the head with the bottom at the bottom of the head and making sure to have it even.


Stitch the eyes to the head where shown.


Crochet chain for the whiskers if desired and attach them near the nose or embroider on whiskers.

For the eyebrows, I made 6 strips of 25 chain in 4 ply crochet cotton and stitched them on as shown.


If you liked this crochet cat potholder, I’ve also designed another cat that you may like.