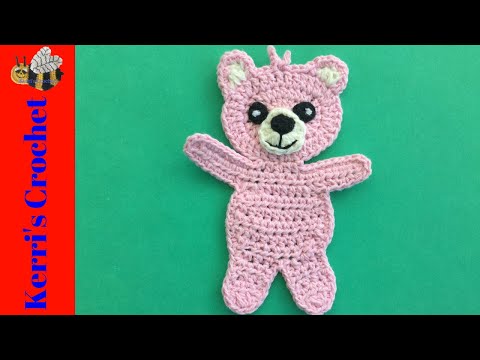
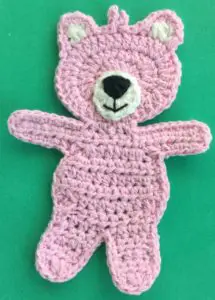
Welcome to my child teddy bear crochet pattern. This teddy bear is going to be a part of my teddy bears picnic blanket that I’m making.
Other patterns that are in the teddy bears picnic blanket series include the blanket, the plaid picnic blanket, picnic basket, the kite, picnic table, food for the picnic table, food for the picnic blanket, pram, airplane, barbecue, barbecue apron and utensils, tree, blossoms and a swing, teddy bear applique, baby teddy bear, teddy bear with accessories, teddy bear and combining the teddy bears picnic baby blanket.


There’s also a video tutorial for this pattern available on my YouTube channel at child teddy bear crochet tutorial.
To view the full pattern, continue scrolling down this page. If you would like to download the ad-free version, it’s available on my Ravelry store for $1 at child teddy bear crochet applique pattern.
This pattern will be using UK terminology. If you would like to view the US version, go to child teddy bear crochet pattern (US Version).
Child Teddy Bear Crochet Pattern
Abbreviations
- st – stitch
- sts – stitches
- ch – chain
- sl st – slip stitch
- dc – double crochet
- htr – half treble crochet
- tr – treble crochet
- dtr – double treble crochet
Materials Used
- 3 or 4 colours of cotton or wool, I used 4 ply crochet cotton.
- Crochet hook, I used a 1.25mm hook.
- Scissors.
- Thread to sew together.
- Sewing needle.
- Darning needle to weave in ends.
Size
Large (Using 8 ply wool)
14cm x 10cm or 5.5” x 4”
Medium (Using 4 ply crochet cotton)
9.5cm x 7cm or 3.75” x 2.75”
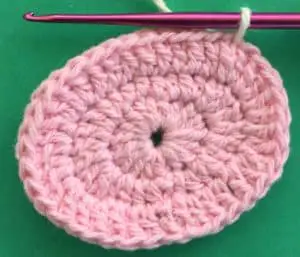
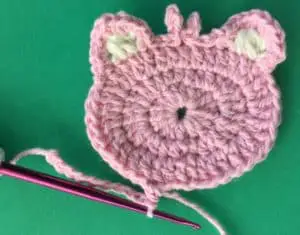
Head
Using main colour make a magic loop.
Row 1: 1 ch, work 3 htr, 3 tr, 6 htr, 3 tr and 3 htr into circle. Pull circle tight and join with a sl st in top of 1st st.
Row 2: 1 ch, work 1 htr in same st as ch, 1 htr in next st, 2 htr in following st, 2 tr in each of next 3 sts, 2 htr in following st, 1 htr in each of next 4 sts, 2 htr in following st, 2 tr in each of next 3 sts, 2 htr in following st, 1 htr in each remaining st. Sl st in top of 1st st.
Row 3: 2 ch, work 1 tr in same st as ch, 1 tr in each of next 4 sts, 2 tr in each of following 5 sts, 1 tr in each of next 8 sts, 2 tr in each of following 5 sts, 1 tr in each st to end. Join with a sl st in top of 1st st. Fasten off.


Ears
Join contrast cotton to head where shown.

Row 1: 2 ch, work a htr cluster over the same st as the ch and the next 2 sts. Fasten off.


Work the 2nd ear to correspond with the 1st ear.


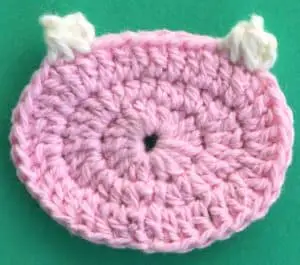

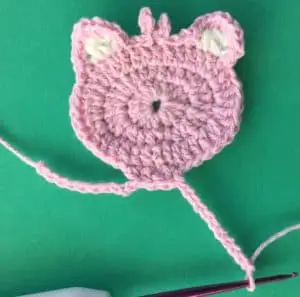
Around the Ears
Join main colour cotton 1 st before the first ear.


Work 2 dc in each st around ear, sl st into next st on head, sl st in each st to halfway between the 2 ears, 2 ch, miss 1st ch and work 1 sl st in next ch, sl st into same place on head, 3 ch, miss 1st ch and work 1 sl st in each remaining ch, sl st into same place on head, sl st along head until st before 2nd ear. Work 2 dc in each st around ear. Sl st into head and fasten off.


Muzzle
Using contrast colour make a magic loop.
Row 1: 2 ch, work 14 tr into circle, pull circle tight and sl st into top of 1st st. Fasten off.


Nose
Using black make a magic loop.
Work 2 ch and 2 htr in circle. Pull circle tight but don’t join. Fasten off.

Eyes (Make 2)
Using black make a magic loop.
Work 1 ch and 4 dc into circle. Pull circle tight and sl st in top of 1st st. Fasten off.


Neck and Arms
Row 1: Using main colour work 9 ch (for 1st arm), work 1 htr in each of 5 centre sts at bottom of head, 11 ch. Turn.


Row 2: Miss 2 ch, work 1 htr in each ch, 2 htr in 1st st on body, 1 htr in each of following 3 sts, 2 htr in next st, 1 htr in each ch to end. Fasten off.


Body
Join main colour cotton 3 sts before centre st.


Row 1: 2 ch, work 2 htr in same st as ch, 1 htr in each of next 5 sts, 2 htr in following st. Turn.
Row 2: 2 ch, work 2 htr in 1st st, 1 htr in each st to last st, 2 htr in last st. Turn.
Rows 3-4: 2 ch, work 1 htr in each st to end. Turn.
Rows 5-6: 2 ch, work a joined htr over 1st 2 sts, 1 htr in each st to last 2 sts, a joined htr over last 2 sts. Turn. Don’t Fasten off.


1st Leg
Row 1: 2 ch, work 1 htr in same st as ch, 1 htr in each of next 2 sts. Turn.
Rows 2-4: 2 ch, work 1 htr in each of the 3 sts. Turn.
Row 5: 2 ch, work a htr cluster over all sts. Fasten off.


2nd Leg
Join cotton to 3rd last st of body as shown.

Row 1: 2 ch, work 1 htr in same st as ch, 1 htr in each of next 2 sts. Turn.
Rows 2-4: 2 ch, work 1 htr in each of the 3 sts. Turn.
Row 5: 2 ch, work a htr cluster over all sts. Fasten off.


Neatening Row
Join main colour cotton to join of neck and head.


Work 1 dc in each st around arms, body and legs back to the neck, sl st into join of neck and head. Fasten off.


To Make Up
Weave in ends. Embroider a white dot on each eye.


Sew the nose to the muzzle and embroider a mouth to the muzzle under the nose.
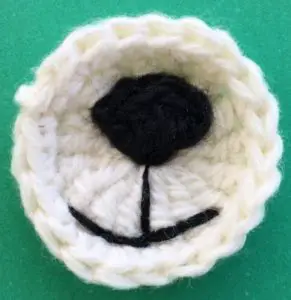

Stitch the muzzle to the head with the top of the muzzle just covering over the centre circle.

Attach the eyes to the head just above the muzzle.
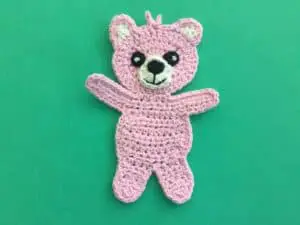

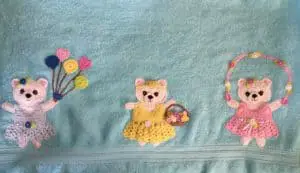
And there’s the finished child teddy bear applique. I’ve also made it in different sizes and colours.

If you’ve liked this pattern, you may also like my other teddy bear patterns. I’ve got two teddy bear appliques at older teddy bear applique and new teddy bear applique, a teddy bear with a dress and accessories, a teddy bear pilot and a baby teddy bear.