
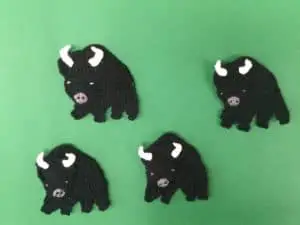
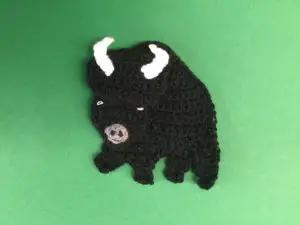
For my latest crochet pattern I’ll be making this crochet buffalo, which was a request from Sandy.

If you would like to follow along with the video tutorial, it’s available on my Youtube channel at Crochet Buffalo Tutorial.

The full pattern is available to view on this page if you continue to scroll down, or if you would like to download the pattern in PDF format it’s available on Ravelry at Crochet Buffalo Pattern.
This pattern will use UK terminology. If you would like to get the US version go to Buffalo Crochet Pattern (US Version).
Buffalo Crochet Pattern
Abbreviation
- st – stitch
- sts – stitches
- ch – chain
- sl st – slip stitch
- dc – double crochet
- htr – half treble crochet
- tr – treble crochet
- dtr – double treble crochet
Materials Used
- Black, grey and white crochet cotton or wool.
- Crochet hook.
- Scissors.
- Thread and sewing needle to sew together.
- A darning needle to weave in ends.
- Black cotton to embroider on the nostrils.
- Grey cotton to embroider on eyes.
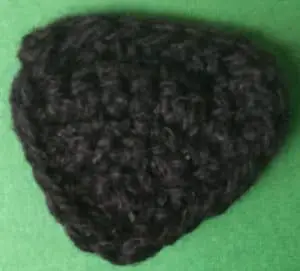
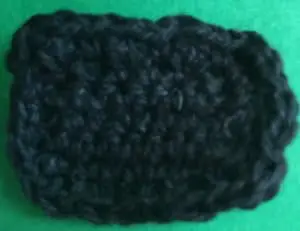
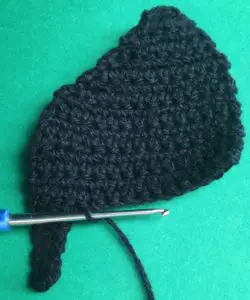
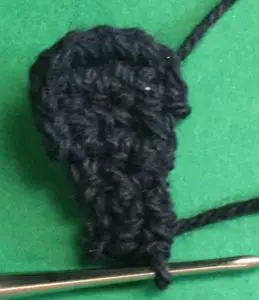
Head
Make a magic loop.
Row 1: 1 ch, work 5 dc into circle, pull circle tight and join with a sl st in ch.
Row 2: 1 ch, 1 dc in each of next 4 sts. Turn.
Row 3: 1 ch, 2 dc in 1st st, 1 dc in each of next 2 sts, 2 dc in last st. Turn.
Row 4: 1 ch, 2 dc in 1st st, 1 dc in each of next 4 sts, 2 dc in last st. Turn.
Row 5: 1 ch, 1 dc in each st to end. Turn.
Row 6: 1 ch, 1 joined dc over 1st 2 sts, 1 dc in each st to last 2 sts, 1 joined dc over last 2 sts.
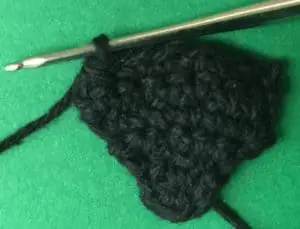

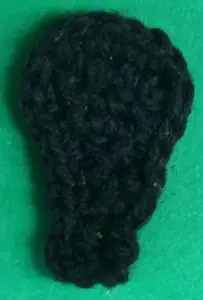
Neatening Row
1 ch, 1 dc in each st around, join with a sl st in ch. Fasten off.

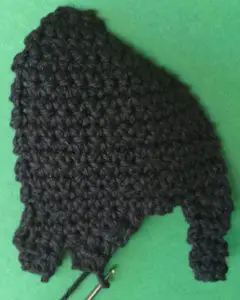
Top of Head
9 ch.
Row 1: Miss 1st ch and work 1 dc in each remaining st. Turn.
Row 2: 1 ch, work 2 dc in 1st st, 1 dc in each st to last st, work 2 dc in last st. Turn.
Row 3: 1 ch, 1 dc in each st to end. Turn.
Row 4: 1 ch, 1 joined dc over 1st 2 sts, 1 dc in each st to last 2 sts, 1 joined dc over last 2 sts. Turn.
Row 5: 1 ch, 1 joined dc over 1st 2 sts, 1 dc in each st to last 2 sts, 1 joined dc over last 2 sts.
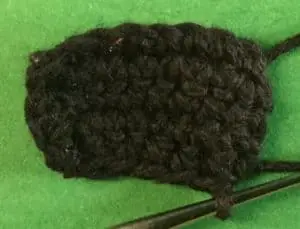
Neatening Row
1 ch, 1 dc in 1st st, (1 htr and 1 tr in next st, 1 dc in following st) repeat around to end. Sl st in ch. Fasten off.

1st Horn
8 ch, sl st in 2nd ch from hook, 1 joined dc over next 2 sts, 1 dc in following st, 1 joined dc over next 2 sts, 1 htr in last st. Fasten off.

2nd Horn
5 ch, sl st in 2nd ch from hook, 3 dc in each of next 2 sts, 1 htr in last st. Fasten off.

Muzzle
Make a magic loop.
1 ch, work 2 dc, 2 sl st, 2 dc and 2 sl st in circle. Pull circle tight and join with sl st in ch. Fasten off.
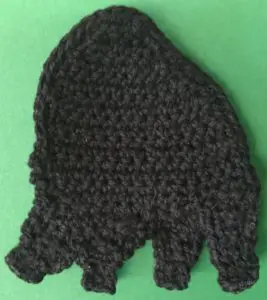
Body
4 ch.
Row 1: Miss 1st ch and work 1 dc in each remaining ch. Turn.
Row 2: 1 ch, 2 dc in 1st st, 1 dc in next st and 2 dc in last st. Turn.
Row 3: 1 ch, 2 dc in 1st st, 1 dc in each st to last st, 2 dc in last st. Turn.
Row 4: 1 ch, 1 dc in each st to last st, 2 dc in last st. Turn.
Row 5: 1 ch, 2 dc in 1st st, 1 dc in each st to last st, 2 dc in last st. Turn.
Row 6: 1 ch, 1 dc in each st to last st, 2 dc in last st. Turn.
Row 7: 1 ch, 2 dc in 1st st, 1 dc in each st to end. Turn.
Row 8: 1 ch, 1 dc in each st to last st, 2 dc in last st. Turn.
Row 9: 1 ch, 2 dc in 1st st, 1 dc in each st to end. Turn.
Rows 10-11: 1 ch, 1 dc in each st to end. Turn.
Row 12: 1 ch, 1 dc in each st to last 3 sts, 1 htr in each of next 2 sts, 2 tr in last st. Turn.
Rows 13-16: 1 ch, 1 dc in each st to end. Turn.
Row 17: 2 ch, 1 htr in each of next 2 sts, a joined dc over following 2 sts. Turn.
Row 18: 1 ch, a joined dc over 1st 2 sts, 1 htr in last st. Turn.
Rows 19-22: 1 ch, 1 dc in each of next 2 sts. Turn.
Row 23: 1 ch 1 dc in each of next 2 sts. Fasten off.


2nd Leg
Join cotton to next st on body after 1st leg.

Row 1: 1 ch, 1 dc in each st to end. Turn.
Row 2: 1 ch, 1 dc in each of next 7 sts. A joined dc over following 2 sts. Turn.
Row 3: 2 ch, a joined htr over 1st 2 sts, 1 htr in next st, 1 dc in each st to last st, 2 dc in last st. Turn.
Row 4: 1 ch, 1 dc in each of next 3 sts. Turn.
Row 5: 1 ch, 1 dc in 1st st, 1 joined dc over next 2 sts. Turn.
Row 6: 1 ch, 1 dc in each st. Fasten off.


3rd Leg
Join cotton in next st to 2nd leg.


Row 1: 1 ch, 1 joined dc over 1st 2 sts, 1 dc in next st, a joined dc over last 2 sts. Turn.
Row 2: 1 ch 1 joined dc over 1st 2 sts, 1 joined dc over same st as last part of joined dc and last st. Turn.
Row 3: 1 ch, 1 dc in each st to end. Don’t fasten off.

Neatening Row
I work 1 ch or 2 ch between the sl sts of the neatening row to give it a shaggy look but work dc in each stitch if you prefer.
(2 ch, 1 sl st in next st) repeat down first leg and along tummy to start of back leg, (work 1 ch, 1 sl st into next st) repeat up back leg, sl st into top of leg, (if working your buffalo in a different colour to the hoof just work a dc over the ends of the legs and work the hoof separately) and make a hoof by working 3 ch, 1 tr in same place as ch, 1 tr in next st, 3 ch, sl st into same place as last tr, sl st to the side of the leg and work 1 ch and 1 sl st in each st up the back leg. Then work 1 dc in each st around body. Work 2 ch and a sl st in each st up front leg, sl st onto top of front leg, 3 ch, 1 tr in same place as ch, 1 tr in next st, 3 ch, sl st in same place as last tr, sl st to edge of leg, work 1 ch and 1 sl st in each st down leg and up to top of next leg, sl st onto top of next leg, 3 ch, 1 tr in same place as ch, 2 tr in next st. Fasten off.


Far Back Leg
6 ch.
Row 1: Miss 1st ch, 1 dc in each remaining ch. Turn.
Row 2: 1 ch, 1 dc in each st to end. Turn.
Row 3: 1 ch, 1 joined dc over 1st 2 sts, 1 dc in next st, 1 joined dc over last 2 sts. Turn.
Row 4: 1 ch, 2 dc in 1st st, 1 joined dc over next 2 sts. Turn.
Row 5: 1 ch, 1 joined dc over 1st 2 sts, 1 dc in last st. Turn.
Row 6: 1 ch, 1 dc in each st. Turn.
Row 7: 1 ch, 1 dc in each st. Don’t fasten off.

Neatening Row
1 ch, 1 sl st in each st around to top of leg, sl st onto top of leg, for the hoof work 3 ch, 1 tr in same place as ch, 2 tr in next st. Fasten off.

To Make Up
Embroider nostrils and mouth on to the muzzle.


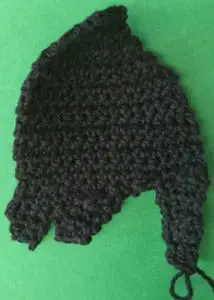
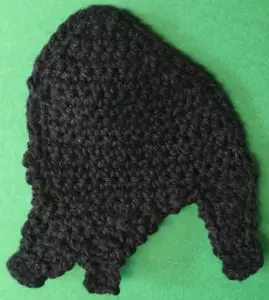
Attach top part of head to bottom part of head.

Stitch muzzle to the head.


Embroider the eyes on to the head just below the join of the two head parts.
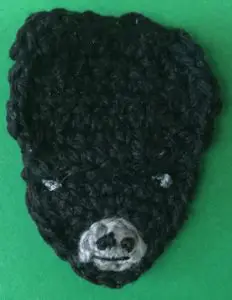

Sew horns on to head.


Stitch far back leg to body.

Attach the head to the body.
There’s the finished buffalo. I hope that you’ve enjoyed it.